7. Billing & Invoicing (Pro)
Create invoices, manage payments, and track your financial transactions.
Note: Billing features require an active Pro subscription.
7.1 Creating Invoices
From an Order (the usual way)
An accepted quote becomes an order, and the invoice comes from the order, so it carries the order's line items, pricing, and deposit:
- Open the order (Orders in the side menu).
- Tap Generate Invoice. The same action is in the ⋮ menu of each row in the Orders list.
- The invoice editor opens pre-filled with the order's line items and pricing. Review and adjust if needed.
- Tap Save.
From a job detail page, the actions menu also has Generate Invoice. What happens depends on whether an order exists:
- The job has an unbilled order: the invoice opens immediately, pre-filled with the order's line items and crediting any deposit already collected on the quote or order.
- The job has an accepted quote but no order yet: to prevent accidental blank invoices where items would have to be manually re-typed, the app detects the accepted quote and shows:
Create the order first "The accepted quote Q-XXXX is not an order yet, so the invoice would open blank. Open the quote and tap Create Order: the invoice then comes filled in."
Tap Open the quote to view the quote, then tap Create Order at the top. Once the order exists, tap Generate Invoice on the job to load all lines automatically without retyping. If you specifically need an empty invoice (for example, for custom ad-hoc charges), tap Blank invoice instead. - The job has no quote or order: it opens a blank invoice already linked to the job and its client.
If Settings > Invoice Settings defers invoicing until the job is completed, the deposit is recorded as a payment only and the invoice is created when the order is marked completed.
New Invoice
Create an invoice from scratch:
- Open Invoices in the side menu.
- Tap + (New Invoice).
- Fill in the invoice details:
| Field | Description |
|---|---|
| Client | Select the client |
| Project | Optional: link the invoice to a job |
| Issue Date | Invoice date |
| Due Date | Payment due date (filled from the default in Invoice Settings) |
| PO Number | Optional: the customer's purchase order number |
| Line Items | Material, labor, fabrication, installation, delivery, product, discount or other |
| Tax & Discount | Tax rate and an optional discount |
| Notes & Terms | Notes and terms for the client (filled from Invoice Settings) |
| Attachments | Files sent with the invoice |
- Tap Save. The invoice is saved as a Draft.
The invoice number is automatic (INV-YEAR-NUMBER). To start the sequence at a different number, use Settings > Document Numbering.
From the invoice, Activate Invoice makes it billable without emailing it, and Send Invoice emails it to the client.
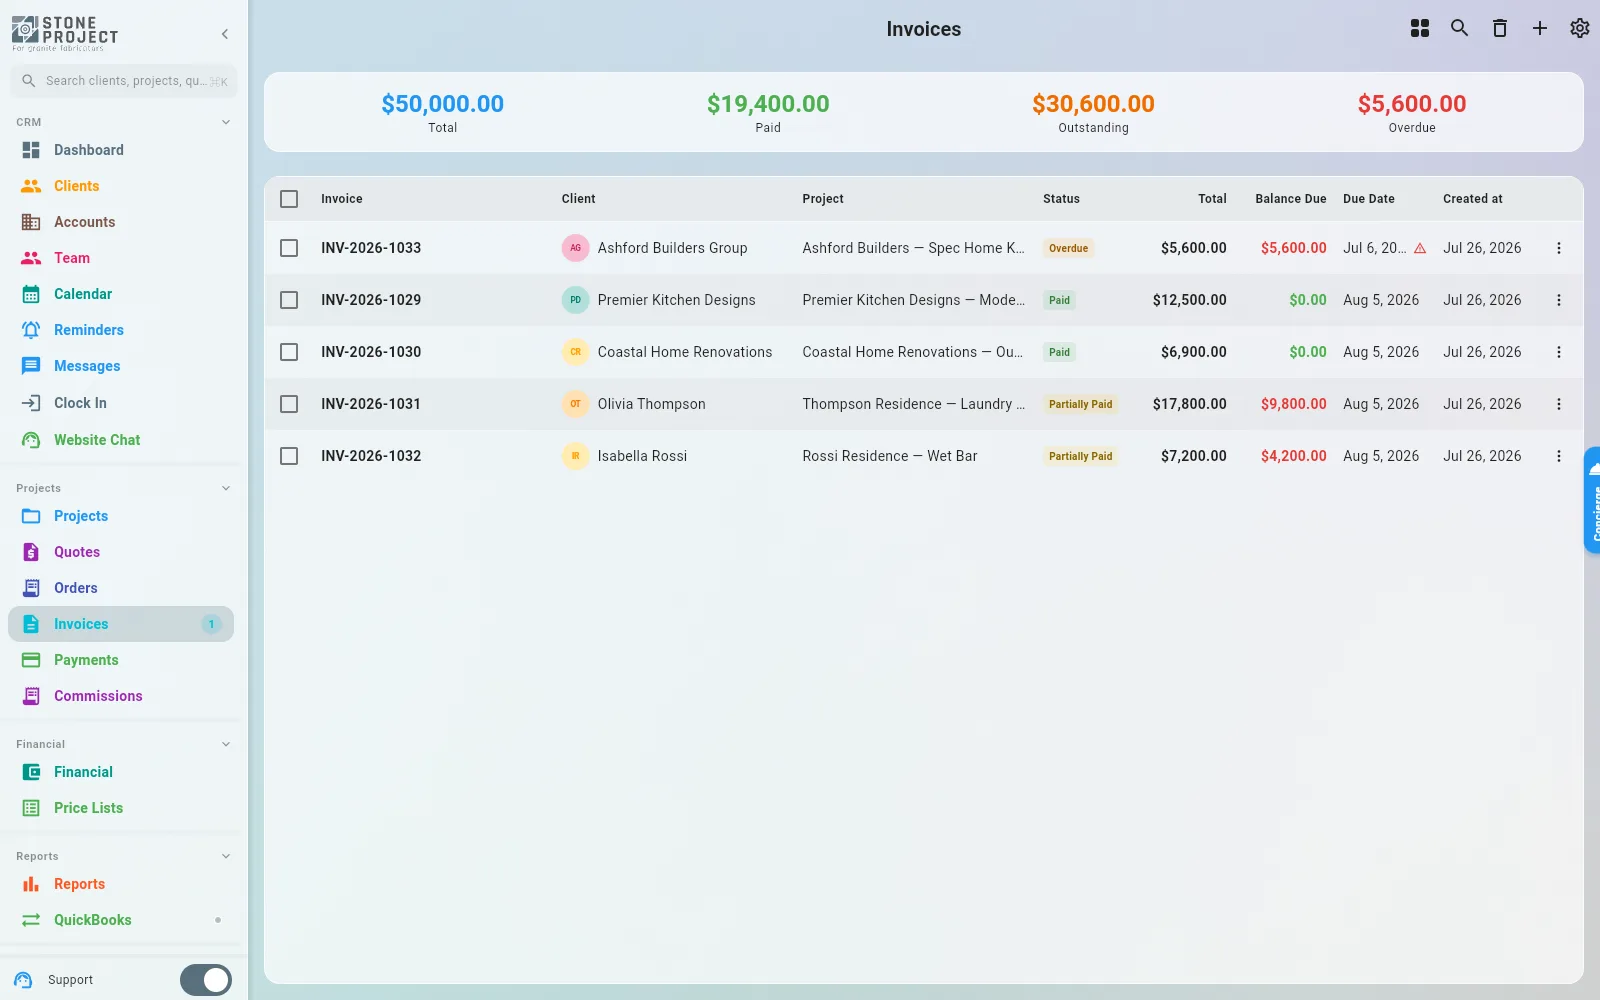
Invoice Statuses
| Status | Description |
|---|---|
| Draft | Invoice is being prepared, not yet issued |
| Issued | Active and billable, but no email has gone out (this is what Activate Invoice does) |
| Sent | The invoice was emailed to the client — the date and address are shown under the status |
| Paid | Payment received in full |
| Overdue | Past the due date without full payment |
| Cancelled | Invoice voided/cancelled |
7.2 Managing Payment Methods
Configure how you accept payments:
- Go to Settings > Payment Methods.
- Add your accepted payment methods:
- Credit card
- Bank transfer / ACH
- Check
- Cash
- Pix (Brazil)
Payment methods appear on your invoices so clients know their options.
7.3 Tax Rates
Set up tax rates for automatic calculation:
- Go to Settings > Tax Rates.
- Tap Add Tax Rate.
- Configure:
- Name (e.g., "MA Sales Tax")
- Tax Percentage (e.g., 6.25)
- State (optional, two letters such as MA): quotes for clients or accounts in that state pick this rate automatically
- Description (optional, internal only; not printed on the PDF)
- Tap Save.
You can keep several tax rates and pick a different one on any quote or invoice. Inactive rates are not applied. With QuickBooks connected, Import from QuickBooks brings your QuickBooks rates in and links the ones with matching names.
7.4 Payment Processing
Recording Manual Payments
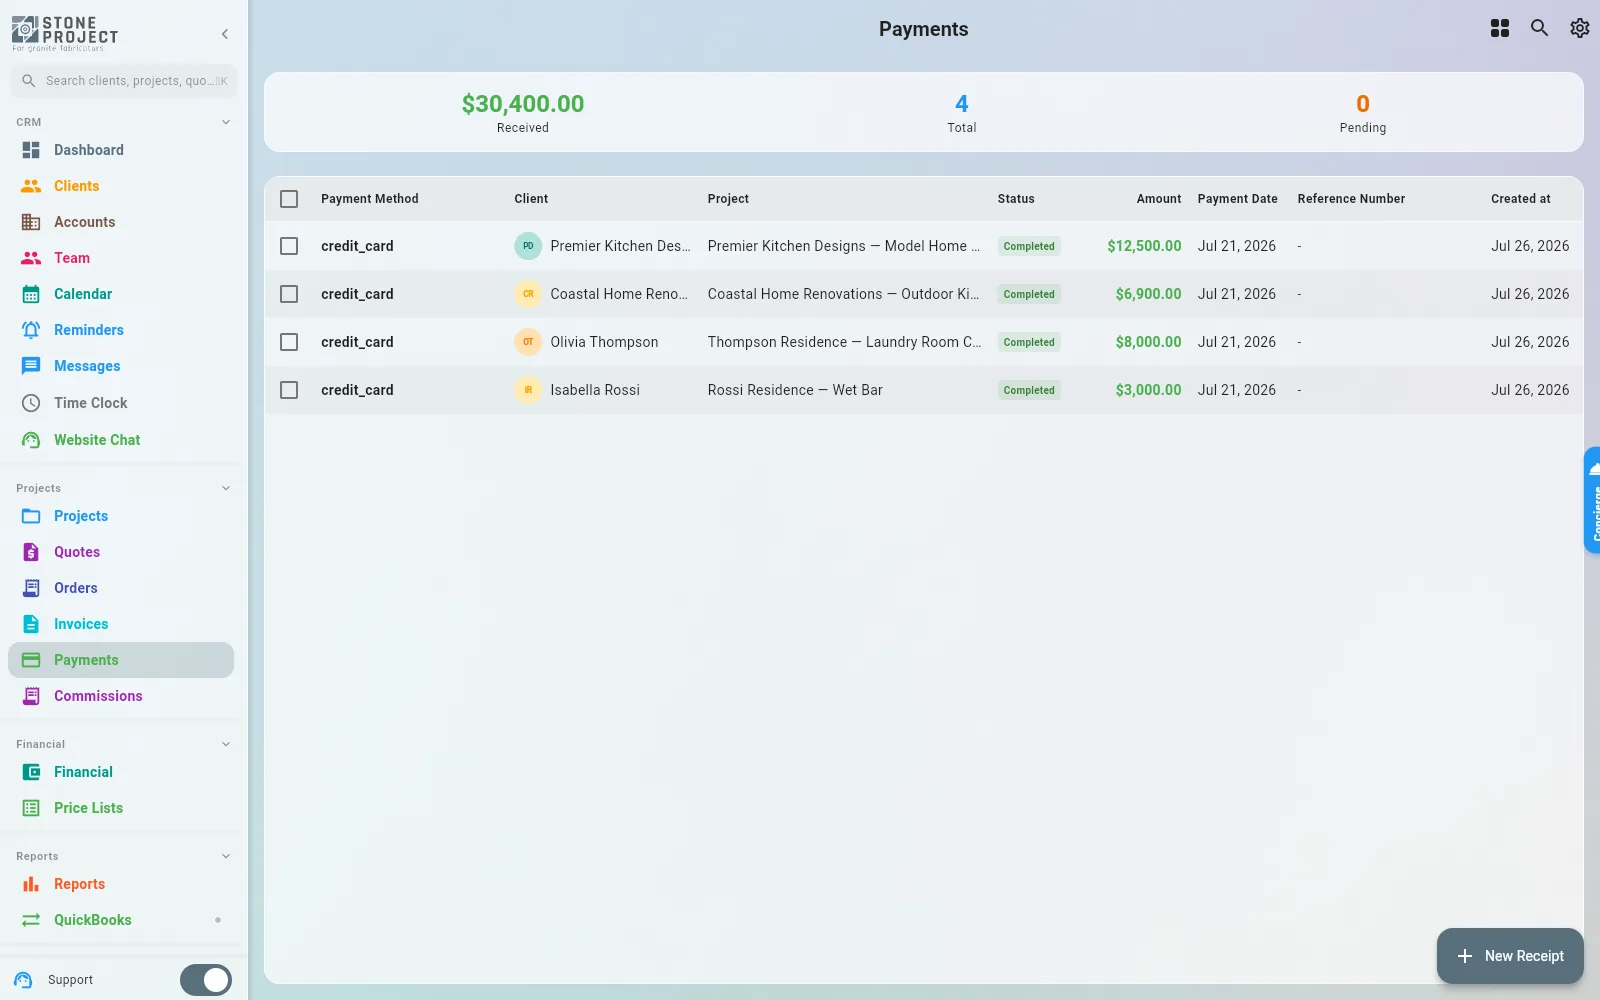
When a client pays outside the app (cash, check, bank transfer):
- Open the invoice.
- Tap Record Payment.
- Enter the amount, date, and payment method.
- Tap Save.
- The invoice status updates automatically (Paid or Partial).
After a partial payment (a deposit that leaves a balance), the confirmation offers Send Payment Receipt instead of recording another payment. The customer usually asks for proof right after paying, and the receipt already shows the remaining balance. Tap it, check the e-mail the app suggests for the client, and send.
One payment for several invoices (a builder's check that pays more than one job): open any of the invoices, tap Record Payment, then Add another invoice to this payment. Pick each of the other invoices and enter how much of the payment goes to it. Saving records one payment on each invoice, all with the same date, method, and reference number, and the summary shows the Total received so you can match it to the check.
Charging a card on the invoice
When a card processor is connected, an open invoice shows Charge card next to Record Payment. The same action is the card icon on Payment History. Enter the card and tap Charge card. The client does not need an email on file. View Payment Link, Copy Payment Link, and Payment link via WhatsApp still need the client's own email, because that link signs them into the portal, and a connected payment gateway (see Let clients pay invoices online): without one the invoice shows Connect online payments instead. A method such as Visa or Mastercard only records that a card was used. The charge itself runs on the processor method, which Charge card selects.
QuickBooks Payment Integration
If QuickBooks is connected, payments can be processed through the QuickBooks payment gateway. See 14.1 QuickBooks Integration.
7.5 QuickBooks Integration
Sync your Stone Project billing data with QuickBooks:
- Go to Settings > Integrations > QuickBooks.
- Tap Connect with QuickBooks.
- Sign in to your QuickBooks account and authorize access.
- Open Sync Settings to choose what runs on its own:
- Enable Auto Sync and the Sync Interval (15 min to 24 hours)
- Auto Export Orders: orders go to QuickBooks as invoices
- Auto Export Payments: payments you record here (check, cash, ACH) mark the invoice paid in QuickBooks. Turn it off if you record payments directly in QuickBooks
- Sync Customers on Connect and Sync Products on Connect: import them on the first connection
- Auto Retry Failed Exports and Max Retry Attempts
The QuickBooks screen also has manual Quick Actions (Export Invoices, Import Updates, Sync Customers, Sync Products, Sync All), Mappings, Pending Changes and Sync History.
What Gets Synced
| Data | Stone Project → QuickBooks | QuickBooks → Stone Project |
|---|---|---|
| Clients | Yes | Yes |
| Invoices | Yes | -- |
| Payments | Yes | Yes |
| Products/Services | Yes | Yes |
| Suppliers/Vendors | Yes | Yes |
For more details, see Integrations > QuickBooks.
7.6 Payment Plans
Set up installment payment plans for your clients:
- Open an invoice.
- Tap Create Payment Plan.
- Configure the plan:
| Option | Description |
|---|---|
| Frequency | Weekly, Biweekly, or Monthly |
| Installments | Number of payments (auto-calculated from total) |
| Start Date | When the first installment is due |
| Amount | Per-installment amount (auto or manually adjusted) |
- Tap Save.
Each installment is tracked individually with its own status (Pending, Paid, Overdue, Cancelled). You can record payments against specific installments as they come in.
7.7 Vendor Bills (Accounts Payable)
Track what you owe to suppliers and vendors:
- Open Vendor Bills in the side menu (under Procurement).
- Tap New Vendor Bill.
- Fill in the bill details:
| Field | Description |
|---|---|
| Vendor | Select the supplier or vendor |
| Bill Number | Vendor's invoice/bill number |
| Date | Bill date |
| Due Date | Payment due date |
| Line Items | Materials, services, or other charges |
| Amount | Total amount owed |
| Notes | Additional notes |
- Tap Save.
Vendor Bill Statuses
| Status | Description |
|---|---|
| Draft | Being entered, not counted yet |
| Pending | Bill received, not yet approved for payment |
| Approved | Approved, awaiting payment |
| Partial | Partially paid |
| Overdue | Past due date without full payment |
| Paid | Fully paid |
| Cancelled | Bill cancelled or voided |
| Disputed | You are contesting the bill with the vendor |
7.8 Commission Reports
Track sales commissions for your team members:
- Open Commissions in the side menu (next to Payments).
- The screen lists every commission with the totals on top (Total, Paid, Pending, Total Cancelled), and filters by status, a search, a date range and a minimum/maximum amount. Tap a commission to see it, then Approve, Mark as Paid (payment method and reference) or Cancel Commission; a cancelled one can be deleted. Create Commission adds one by hand (team member or client, optional project and quote).
- For a period summary by recipient, use Reports → Commissions (see Analytics > Commission Reports).
Commission rules (on/off, Percentage, Fixed Amount or both, Inclusive or Deductive, notes) are set as defaults on:
- The client (a referral partner earns on their jobs) — client form.
- The account (dealer) — account form.
- The job — job form, and the commission can be adjusted on the quote (drawing price details) for that sale only.
A team member (salesperson) is paid through a commission created on the Commissions screen with recipient type Team Member.
Commission Statuses
| Status | Description |
|---|---|
| Pending | Commission calculated but not yet paid |
| Approved | Approved for payment |
| Partial | Part of the amount was paid |
| Paid | Commission paid to the recipient |
| Cancelled | Commission voided (e.g., project cancelled) |
For online collection, see Accept local payment methods: Stripe local methods, Mexican installments and Yappy in Panama.
7.9 Invoice Settings
Configure default settings for your invoices:
- Go to Settings > Invoice Settings.
- Configure:
| Setting | Description |
|---|---|
| Default Due Date (days) | Days after the issue date for the due date of new invoices |
| Default Notes | Notes added to every new invoice |
| Default Terms | Terms and conditions added to every new invoice |
| Payment Information | Bank details or accepted methods, appended to the invoice notes |
| Auto-attach Project Files | Attach the job's files when an invoice is created for a job |
| Invoice only on order completion | The deposit is recorded as a payment only; the invoice (and its QuickBooks export) is created when the order is marked completed |
| Weekly invoices for finished jobs | Pick a day (off by default). That day at 8 a.m., every job completed in the last week with an accepted quote and no invoice gets a draft invoice, and owners/admins get one notification. Nothing is emailed to the client until you send it. Not used when invoices are created by hand |
| Allow editing paid invoices | For a job that changed after the client paid: payments stay, the invoice shows the new balance |
| Final invoice format | Simple (balance only) or gross total with the deposit credit |
| Sales Tax Allocation | Proportional (single invoice) or all on the final payment (multiple invoices) |
| Charge sales tax on materials | On by default: stone, backsplash and products are taxed |
| Charge tax on labor and services | Off by default (US rule); turn on where everything is taxable |
- Tap Save.
Invoice numbers are not set here: they follow INV-YEAR-NUMBER, and Settings > Document Numbering sets the starting number. Tax rates live in Settings > Tax Rates.
7.10 Fiscal Documents (Brazil: NF-e and NFS-e)
Shops in Brazil issue the legal nota fiscal straight from the invoice. The card Notas fiscais appears on invoices of a Brazilian shop; other supported countries use their own fiscal provider.
One-time setup (Settings > Nota fiscal, needs company edit permission):
- Fill in the company's CNPJ in Company Profile (the CEP of the address is used to find your municipality).
- Choose the A1 certificate file (
.pfx), type its password and tap Send and connect. The certificate goes to our fiscal provider; Stone Project keeps only its expiry date and warns the owner 30 days before it expires. - Fill in the tax profile: regime (Simples, MEI, normal), IE, IM, CNAE, IBGE code of the municipality.
- Fill in the codes your accountant gives you for each line type: NCM (and, if different from the default, CFOP, CST/CSOSN, PIS/COFINS) for the stone, and the national service code for the installation.
- Keep Test while you check the first notes; switch to Production when they are right. Test notes have no legal value.
Issuing: on the invoice, tap Issue fiscal document. The countertop, material and fabrication lines go on an NF-e (ICMS); installation and labor go on an NFS-e (ISS, padrão nacional); your own delivery goes on the NF-e as freight. Each one shows Processing until the tax authority answers, then Authorized with the number, the key, the PDF (DANFE/DANFSe) and the XML, which are also kept in the job's files.
If something is missing, nothing is sent and the message names it: the client's CPF/CNPJ, a CEP that does not exist, the NCM or the service code. The client's IE (or ISENTO) goes on the client form; without it the client is treated as a final consumer.
Cancelling: tap the block icon on an authorized note and write the reason (at least 15 characters). An NF-e can be cancelled within 24 hours of authorization.
7.11 Fiscal Documents (Mexico: CFDI 4.0)
Shops in Mexico stamp the CFDI from the invoice, in the same Fiscal documents card.
One-time setup (Settings > Facturación electrónica): fill in your régimen fiscal, C.P. de expedición and serie, then send your CSD (.cer, .key and password). Set the ClaveProdServ and ClaveUnidad your accountant uses for material and for installation. Stay on Test until the first CFDIs look right.
Clients: RFC (in the tax ID field), régimen fiscal and uso del CFDI on the client form, and the postal code of their tax address. A client without RFC is invoiced to the general public (XAXX010101000).
What gets stamped: an invoice already paid in full is stamped PUE with the real payment form. Anything with a balance is stamped PPD (form 99), and then every payment you record (deposit, balance, OXXO, SPEI) gets its own CFDI de pago (REP) automatically within the hour. PDF and XML of each one appear in the card and in the job's files.
Cancelling: pick the SAT motive (02 errors, 03 sale did not happen, 04 global invoice). The receiver may have to accept; the card shows Cancellation pending until the SAT answers.
7.12 Fiscal Documents (Argentina: ARCA)
Open Settings > Fiscal documents in an Argentine shop. Enter the issuer CUIT in Company Profile, then select the WSFEv1 point of sale and issuer VAT condition, Ingresos Brutos registration (or exemption), and activity start date. Upload the certificate and private key for the selected environment. Web service delegation itself is free; production and homologation use separate credentials.
On the client or account form, enter CUIT/DNI, select its document type and VAT condition. On each invoice line choose the IVA rate confirmed by your accountant. The invoice editor calculates IVA after the invoice discount. Issue fiscal document asks for the actual service period when there are service lines. The line taxes and invoice total must agree before anything is issued.
An authorized document shows its CAE and PDF. Factura B includes IVA Contenido; Factura C has no separately charged IVA. Homologation PDFs say SIN VALIDEZ FISCAL. WSFEv1 does not provide a stamped item-level invoice XML. If the result is uncertain, refresh the same document: do not create a duplicate. To reverse an authorized voucher, issue the corresponding credit note through ARCA. This first release supports domestic ARS invoices; foreign currency and additional taxes are not supported.
7.13 Fiscal Documents (Italy: Fatture in Cloud)
An Italian shop connects its own Fatture in Cloud account under Settings > Fiscal documents. Choose Connect Fatture in Cloud, authorize access, return to settings and choose your company. Your FiC account must have API access and e-invoicing enabled. Connection availability also depends on the Stone Project OAuth app being approved for your account.
The buyer needs P.IVA or Codice Fiscale, an Italian address with CAP/province, and the SDI recipient code or PEC. Enter the FatturaPA payment method and invoice series in fiscal settings. Set IVA on each invoice line; zero IVA also requires its Natura. The rate must match an active e-invoice VAT entry in your FiC account. Reduced rates are selected by your accountant, not inferred by Stone Project.
Validate only creates a draft in your FiC account and checks it with dry_run; it is not sent
to SDI and is never shown as authorized. Production sends a real invoice through your account.
Uploading is followed by status checks. SDI acceptance and delivery are distinct; failed delivery is
shown explicitly. Correct XML problems on the existing FiC invoice, then refresh its status in Stone
Project. Use a credit note to reverse an invoice already sent to SDI. This release supports domestic
EUR invoices; withholding, reverse charge, public administration and export invoices require another flow.